Monday, December 30, 2013

Celtic Solstice mystery part 5 link-up (and some hexies)

I'm afraid his weekends progress on Bonnie Hunter's Celtic Solstice mystery is pretty poor :(
 
 
I only finished two blocks, but I did cut out all of the blue triangles and a few neutral triangle sets.
I got lots of organizing done, cleaned and oiled two older machines, and worked on hexies.


I know the star is a little dark, but I think the monsters are cute and to be honest I'm running out of fabric.  It's getting hard to remember which fabrics I've already used!
 
 
Still hoping to have this quilt finished by September!
 
 
(Go here to see all of the mystery participants who did make progress).

Sunday, December 22, 2013

Celtic Solstice mystery part 4 link-up

This week's step in the Celtic Solstice mystery is green and orange four patches. So nice to have an easy step since everyone's busy getting ready for the holidays.


The weather here in Florida was so warm (82 degrees!), so I decided to go outside for pictures.
The grass is still so green!


I love these plastic containers from the Dollar Tree. They are great for keeping quilt parts in and will store up to 8 inch blocks.


Thanks for stopping by!
Click here to check out everyone else's progress.

Saturday, December 21, 2013

Another finish- antique stars!

I recently finished up this quilt made from blocks that I "won" on a fellow bloggers website. Check out debzpicaday.blogspot.com.  Deb makes quilts and Christmas stockings for our troops and their families, shares inspiration and takes a picture a day for her blog.
 
 
On one of her "win it Wednesdays" (day 448) she gave away a bunch of patriotic antique blocks that she got in a lot from Ebay.

 
Some of the blocks were pretty worn, but I salvaged what I could and finally pieced them together with new border fabrics that looked aged. I hand-tied it with pearl cotton because all of the stars were hand pieced and were a little uneven and wouldn't lay flat. 

 
I especially like the double-pink stars- not sure if they started out red, but I think it gives a nice variety.

 
 Thanks for looking
and 
Thanks Deb!

Sunday, December 15, 2013

Celtic Solstice mystery part 3

I spent the weekend working on Quiltville's Celtic Solstice mystery quilt part 3.


200 half square triangles! I have used the Easy Angle rulers lot of times before, but now that I have watched the video tutorial, I am finally using them the right way. Thanks Bonnie!
You don't have to do all that squaring up when you cut in the right place.


I still need to make 24 more pinwheels.


Love these sunny colors -my favorite is the key fabric from the bargain bin! They will stand out nicely against the blues and greens.

Click here to see everyone else's progress- more than 200 quilters across the world sharing pictures of the same mystery!

Thursday, December 12, 2013

Celtic Solstice part 2

Finally caught up with Celtic Solstice part 2.
 
 
I love how this is turning out so far. Can you see the smiling teeth?
Can't wait for part 3!
(Go here to see the link-up with everyone's progress)

Friday, December 6, 2013

Grandmother's Flower Garden

This is a quilt top I quilted for a friend. Her mom inherited it from a family member. I was going to try to machine quilt it, but it was hand pieced and had lots of lumps and puckers!


I finally decided to tie it with embroidery thread to match the orange centers and green edges.  


I backed it with white muslin and found an exact match for the green for the binding. The binding was cut on the bias, so that I could do the wavy edges.


I think it turned out pretty good for my first non-straight edge binding. Surprisingly, the dark colors didn't even bleed when I washed it- bonus!

Sunday, December 1, 2013

Celtic Solstice mystery quilt

 
Here is step one of Bonnie Hunter's Celtic Solstice mystery- so exciting!  I have only finished about half of the 188 triangle in a square blocks, but should be able to finish up in the next couple of days.
 
 
This is the first time using the Tri Recs rulers and so far so good!

 
Can't wait to see everybody's progress!
 
Thanks for stopping by,
                                                    Amy

I'm back- with a little Holiday spirit.

Here I am!
I have been away from this blog for a little while. I started having computer troubles and I just lost interest. Apparently I did something to my Google Nexxus tablet and can no longer scroll on the home page, so that I can only look at the first few blog posts on the blogger home page. If anyone has an idea how to fix this please contact me. For now I am using a pretty old, slow netbook. 

I have been very busy quilting though and have quite a few finishes lately. I have been trying to get organized to start Bonnie Hunter's Quiltville mystery "Celtic Solstice" that started on Black Friday. Check it out if you have never been to her site or done a mystery quilt- lots of info for new and seasoned quilters. This will be the third quilt mystery I have done and the main reason for starting this blog. Once a week, you can link up to show your progress. Its fun to see how others choose different fabrics and colors.

Here is a Holiday project- It is a "quilt-as-you-go method" table runner made from scraps. I used 1.5 and 2 inch strips.


You could also use different colors for different seasons, such as orange and black for Halloween, or spring colors for Easter. Or, if you're feeling really adventurous, you could probably make it double sided.


It is a very fast and easy little quilt to make- great for a gift or yourself! 


Hope this inspires everyone to get into the Holiday crafting spirit!
Thanks for looking!
Amy

Friday, May 24, 2013

Meet our Bailey


Today I am linking to Karen's blog, Sew Many Ways. She is having a "share your pet" linking party to celebrate her dog Annie's birthday.


This is Bailey, a 12 year old Springer Spaniel we adopted from ESRA- English Springer Rescue about 3 years ago.  This is a wonderful organization that finds foster homes and forever homes for surrendered and abandoned Springers. Check out their site- it is amazing to see how widespread and dedicated this group is. So far, we have only worked with them this one time, but I continue to check in on the site to see the pictures and read success stories.


Our Bailey came to us from a very nice lady in Pensacola, FL who had to give him up to transition into assisted living.  She and her husband got him as a puppy the day they retired.  They took very good care of him and sent all his papers, vet history and even his diploma from puppy training school!  I could tell in her notes how hard it was to part with her dear pet, so we keep in touch and send pictures a few times a year. 
 

Trying on his life vest- getting ready for vacation!

I am sure all the quilter's out there can relate to this one...


Can't wait to help lay out quilt blocks!

  
Thanks for stopping by!  Can't wait to see every one's pets and read their stories-

Happy Birthday Annie!


Friday, April 19, 2013

Tops for Donation (& some math)

Here are a few tops I have decided to donate. I really have lots of tops and I have neither the talent or the money to get them quilted. A very nice lady that I know belongs to a guild that makes quilts for different charities, so I decided to donate these. The first two are a large throw size and the third is twin sized. 


I used 3" strips from my scrap bin to sew this up "jelly roll race" style. You can get an idea here about how these work. I didn't piece my strips on the diagonal- much easier that way. I used mostly fabric from thrift store shirts, so this one is more masculine. 

If you want to do this with strips you already have, to get the length of the initial strip, just do this simple math: 

Decide what size quilt you want- for example a twin is about 75 x 98.  Multiply the length by width to get 7350.  Divide that by the number of inches in the finished strip. Example: a jelly roll is 2 1/2 inches wide but that finishes at 2" after a quarter inch seam allowance. So, 7350 divided by 2 is 3675 inches.  Divide that by 36 to get yards and that makes it 102.08- make it an even 102 yards.   

length X width = A
finished strip size = B
A divided by B divided by 36 = number of yards

You can plug in the numbers if you wanted to use 3, or 3 1/2 or 4 inch strips- It works with any size.  (I had a little trouble figuring this out at first, so if you still need help, call a friend who is good at math).  


This used up a jelly roll that someone gave me- it was fun working with the bright colors that matched! The pattern is called "Strip This Quilt" from  Judi over @ Green Fairy Quilts.  Check out her blog- she is a very talented and does some of the most amazing quilting.


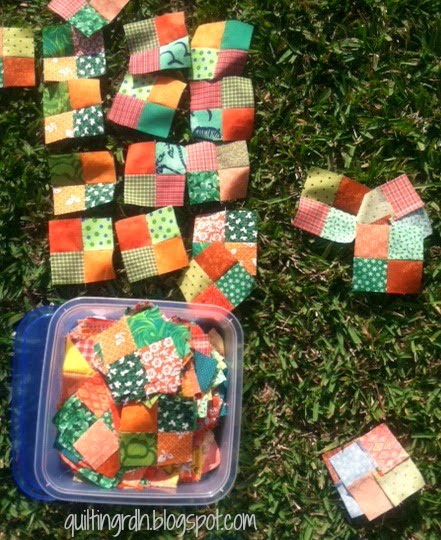
Here is another that used 3" strips, but in between, I sewed in 3" squares to give it a little different look (and to use up some of my overflowing 3" squares box.)  These were just the more "girly" strips that were left over after making the plaid quilt above. The strips were mostly 12- 36 inches- anything goes!

Anyone who loves to piece and has have tons of fabric or tops that they can stand to part with, you may consider donating to your local guild. I'm sure they have members who would be more than happy to finish them for a good cause. 

Saturday, April 13, 2013

Drunkard's Path Quilt... Finished!

I would like to show off a finish- since they are few and far between...

This block was made with the quick curve ruler from Jenny @ Sew Kind of Wonderful. She has designed the ruler and also many patterns to go along with them- more like sew kind of clever!  Check out her blog too, she has lots of neat tutorials and free patterns. She just completed a Double Wedding Ring that I can't wait to try.


You can do so many configurations with this easy light/dark block.  I went with the one on the right.  I made it scrappy because, frankly, I wasn't sure I would be able to make the curved seam. It looks very intimidating. I purchased the ruler over a year ago and never did anything with it.


Anyway, I dug through my scraps because I didn't want to mess up any "good" fabric. Then once it turned out OK, I didn't want to toss any good curvy blocks, so I used them all. I think it turned out really nice.

Here are some close-ups of the quilting.  I just backed it with flannel and didn't use batting and quilted about 1/2 inch from the seams.


It looks like window panes on the back.


I love this red binding- came from Wal-mart on clearance- and also got it in pink, cheddar and lime.
Thanks for stopping by! 


Saturday, March 23, 2013

Dining Room Chairs Make-over


This past weekend, I helped a friend cover her dining room chairs.  They are at least 30 years old.

Here are the "befores"...


Old, slightly faded fabric. The wood still looks pretty good.


We just unscrewed 4 screws under each seat, and took out hundreds of staples.


And the "afters"...


Using the old covers as a pattern, I cut the fabric to size and stitched a small seam in the front corners.  The foam cushion was still in good shape, so we just covered the seat, flipped it over and started stapling. 


I also removed the old cording and peeled the old fabric off so that I could re-use it.  I used a zipper foot to cover the cording with the new fabric- first time I've ever done this and it turned out great and was so easy!


Close-up of the cording...


We did six chairs and the final price was less than 40 bucks- beats buying new furniture!

Thursday, February 28, 2013

I Heart Hexies!

I have been busy adding to my hexagon quilt which is a slow process- my fingers are quite sore. Here is a little peek... 


But I recently took a break and was inspired to make this bag by a pillow I saw over at Fabric Mutt.  Please check out her site- she has lots of neat tutorials!


This project was fast and easy and uses hexies (my favorite). The navy fabric was quilt that I found at a garage sale last summer that I fully intended to use to make bags. However, I got cold one night last fall and it has been on my bed ever since. The handle used to be curtains. I have enough fabric to make 8 bags- so excited!  Now I just need to decide on a top to finish for a new bed quilt- its going to be 30 degrees this weekend here in sunny Florida.

Sunday, January 27, 2013

Heart Baby Quilt with Flannel Back


I found this lovely, easy pattern at Blue Elephant Stitches.  Check out this site- she makes lots of beautiful quilts and takes the nicest pictures! 


I used 3 inch squares from my scrap bin- some of the neutral squares are brighter squares turned over.  Sometimes if you have a medium fabric that isn't dark enough to be considered a dark, you can flip it over and have a light. I have heard of people doing this and now I know it works!


Now, I am a pretty good "piecer" but not a good "quilter."  I can't hand quilt, and my machine quilting stitches are so bunched up and ugly, so I used a floral flannel for the back and no batting.  It goes against everything that I know, but I stretched it on the floor, pinned front to back and "quilted" it on my machine with just the regular quarter inch foot- no walking foot. I did a criss-cross pattern and it turned out sooo good- like a professional-good.

The baby who received this lives in Florida, so it doesn't have to be warm.  I see more no-batting quilts in my future!

Sunday, January 20, 2013

Horse T-shirt Quilt


Here is a quilt I made for a friend who was really involved with horses.  I guess its like if you are a runner and every race you run gets you a t-shirt- she went to lots of horse events.


This is the first and only quilt I have ever made using t-shirts.  I just kinda made it up as I went along- its about a twin size.  I took the shirts to the fabric store and tried to coordinate some of the colors.  


After I added the iron on stabilizer, I squared up the pictures.  Every one was a different size, so I just added fabrics until they were the same size as the next square.  If you've ever pieced a quilt back from extra yardage and left over quilt blocks, this is about the same method.   


The letter blocks were stitched on an embroidery machine. (Her horse's name was Shoshoney)


I added some easy quilt blocks to make it interesting and to take up space. 


This horse block was found online under "horse coloring pages."  I figure coloring book pages are usually pretty simple and easy to copy and embroider. I just traced the pieces, ironed on the fabric, cut the pieces out, peeled off the paper, ironed them on to the backing fabric and used a blanket stitch around the edges.

  I was concerned that it would feel stiff, but if feels just like any other quilt without all the stabilizer.  Overall, I think it turned out really good and would do it again.